To Personalize your Bump messages the first thing that needs to be done is to create your Rebump Recipient Spreadsheet. The following instructions will walk you through this simple process.
Step 1. Login to your Rebump account by going to https://www.rebump.cc and then click the black “Login” button found in the upper right hand corner of the home page.
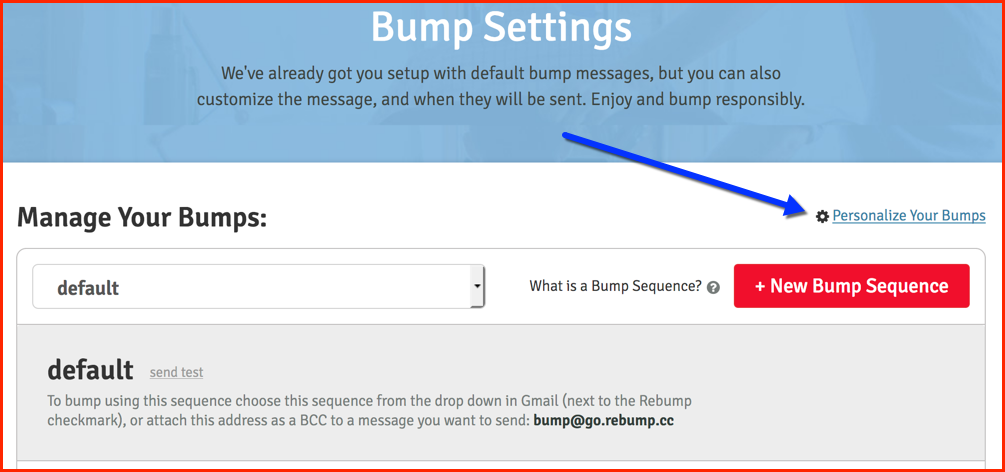
Step 2. Click the “Bumps” Tab found at the top of the page.
Step 3. Click on the link that says, “Personalize Your Bumps”.
Step 4. In order to personalize your Bumps you will first need to create table columns for your Rebump Recipient spreadsheet where you will store your contacts. To add a new personalization table column, click the “+ Add Column” link.
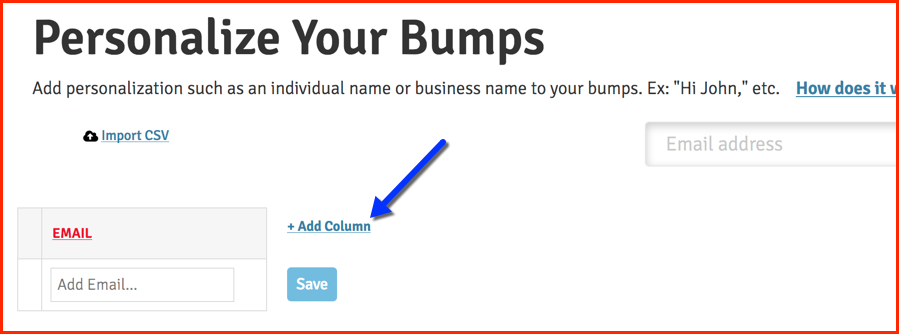
Step 5. Give your new column a description to describe the data that will be saved in that table column, such as FIRSTNAME, LASTNAME, FULLNAME, COMPANY, etc., and then click “Save”. You may have a maximum of 5 personalization columns.

The second way to enter your contacts into your Rebump spreadsheet is to upload a CSV file of your contacts. To import your contacts from a CSV file, click the link that says, “Import CSV”.
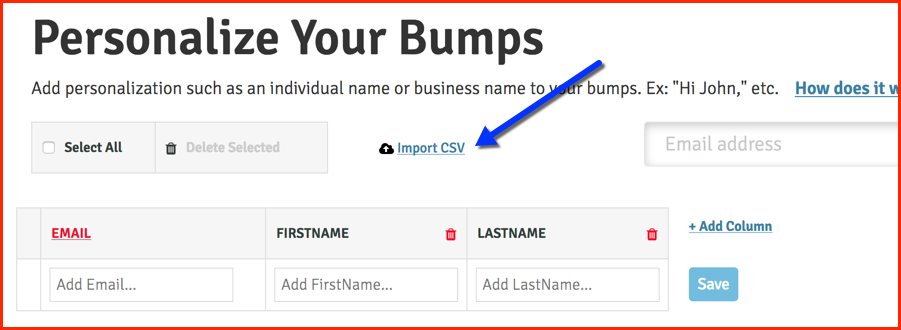
Next, select the CSV file you wish to upload and click the Upload button. Note that the columns in your CSV file will need to match the column names in your Rebump Recipient Spreadsheet. Specifications for table column mapping are as follows.
- Each row contains the email address of a recipient and a column for each of the custom data you want to include. The custom data can be any text up to 255 characters. This can be used for first name, last name, company, or any other data for this recipient.
- The columns can be named whatever you wish (ex: Firstname) but they are limited to one word with no special characters including spaces.
- If a cell is left empty no data will show up for that variable in the bump. I.e. if a Firstname cell is left empty it might show up like this in your bump “Hi ,”
- Rows can be added manually or can be uploaded in bulk via a CSV file. Every new upload will append the new data to the existing list.
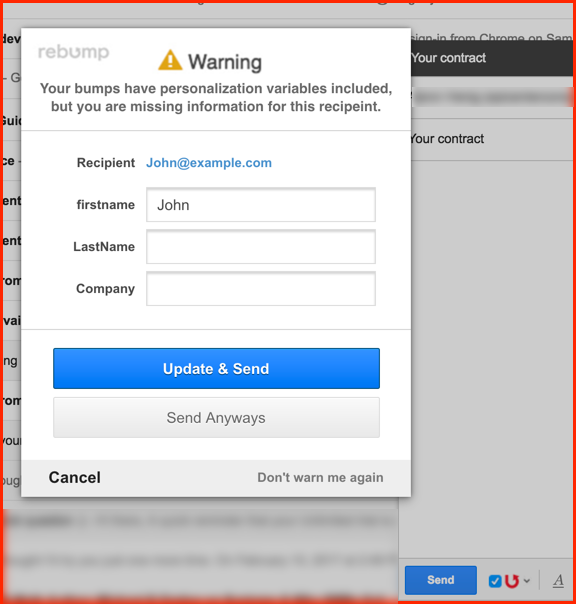
- If you are using the Rebump Chrome Extension you will be warned when trying to send a message, whose bumps contain personalization, if the recipient’s information is missing or incomplete. You will be able to add/update the information right in Gmail.
- The format of the CSV file should be exactly as the format of the table. Make sure that the column names are exactly the same and or in the same order.
- The max amount of columns including the email column is 6.
- Existing values will be overwritten when re-uploading data for an existing email address.
The third way to add contact information into your Rebump spreadsheet is to add it at the time when you send the message in Gmail.
When you check the Rebump checkbox to activate Rebump for that email message, If you have that recipient’s information saved in your Gmail contact list, AND you are using a Bump sequence that includes at least one personalization variable (discussed next in this email), Rebump will automatically pull that person’s information from your Google contact list into your Rebump spreadsheet. If you do not have that person’s information saved in your Google contact list, Rebump will prompt you to manually enter it.
How to Add Personalization Variables into Your Bump Sequences
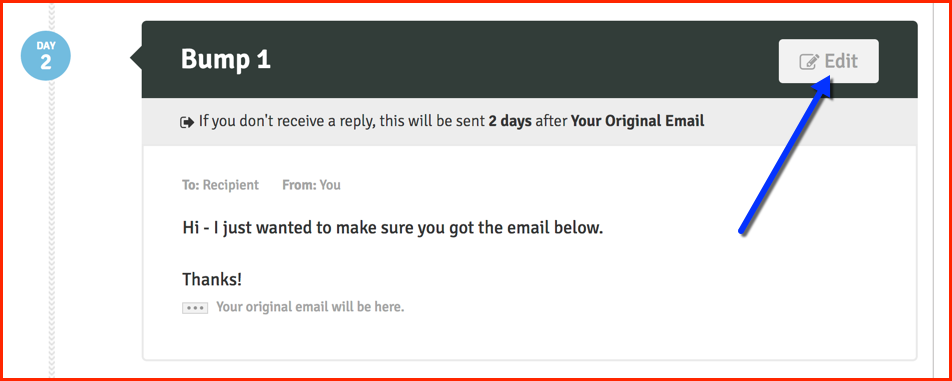
Step 1. In your Rebump account, click on the “Bumps” tab.
Step 2. Choose the Bump Sequence you wish to edit.
Step 3. Click the Bump Edit Button
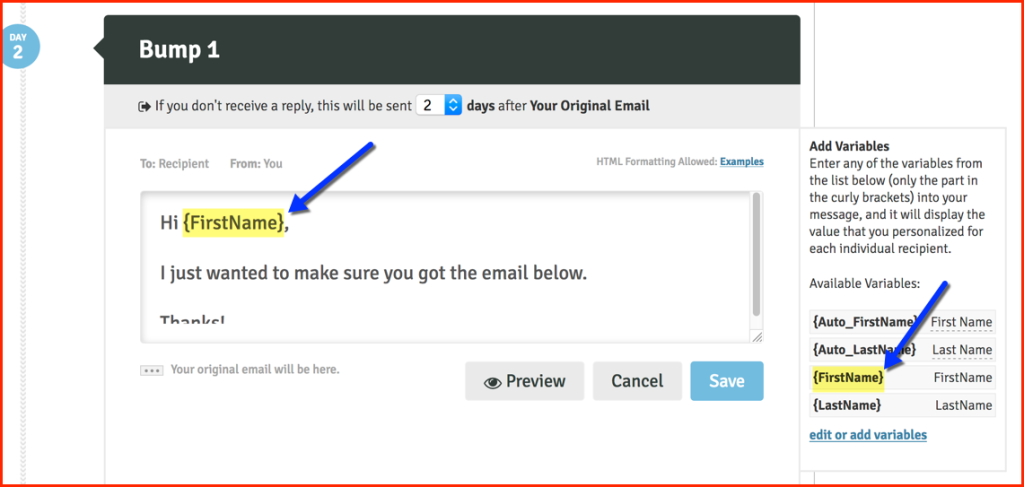
Step 4. Add the personalization variable(s) you want to use into your Bump message and then click Save. You can see the personalization variables you have available on the right hand side of your Bump message text box, and you can copy them right from that panel and then paste them into the bump text box to ensure there are no spelling mistakes. If you want to add new personalization variables, click on the link that says, “edit or add variables”.
It is important to remember to include the curly brackets { } when adding your personalization variables because they will not work without them.
Once you have added your personalization variables to your Bump messages, whenever you use that Bump Sequence, your recipient’s personal information will automatically be added as long as you have that person’s information in your Rebump spreadsheet.
If you do not have a person’s information in your Rebump spreadsheet when you try to send that person an email with Rebump activated, Rebump will prompt you to enter that person’s information, and then Rebump will autosave that information in your Rebump spreadsheet.
How to use the Rebump Auto Personalization Variable
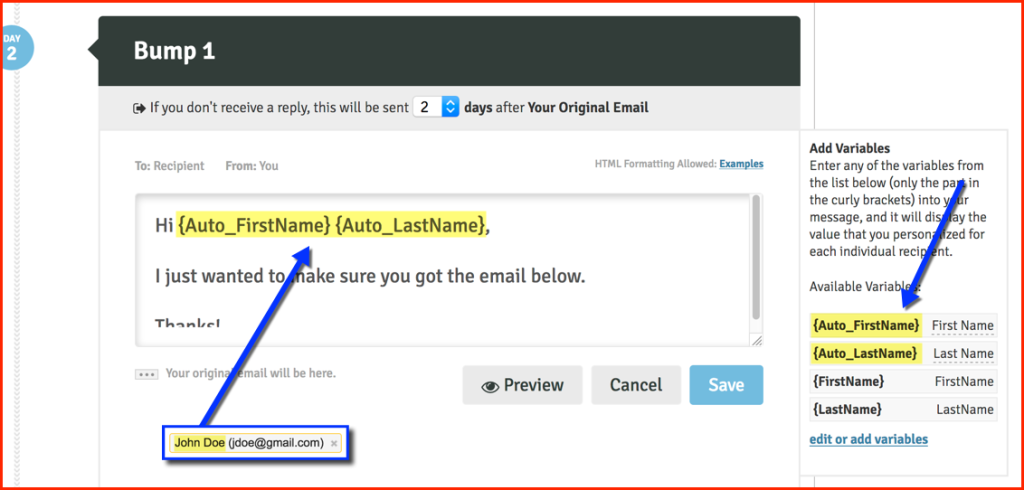
Because Rebump is a Gmail Extension, it can work with your Gmail contact list to auto-pull name information (first name and last name) from your Gmail contact list into your Bump sequence emails using Rebump Auto Personalization Variables.
To use Auto Personalization variables in your Bump sequence messages, simply add the {Auto_FirstName} and/or {Auto_LastName} variable to your Bump sequence messages as shown below and then click Save
If you need a hand with this feature or have any questions, our help center is your go-to resource for all the guidance you need. And if you prefer a more personal touch, feel free to drop us an email. We’re here to ensure your experience with our new attachment feature is smooth and hassle-free, so you can focus on crafting those perfect follow-up emails.